← Back to all documentation
Deployment Guide

Workbrew Deployment Guide: Jamf Pro

Workbrew streamlines secure, automated Homebrew package deployment for macOS, integrating seamlessly with Jamf Pro to give IT teams centralized device management. Homebrew is the de-factor package manager on macOS, installed on tens of millions of devices and offering more than 15,000 packages. With zero-touch deployment, policy enforcement, and real-time monitoring, Workbrew lets you leverage the power of Homebrew, whilst ensuring compliance and eliminating security risks.

Outcomes

By the end of this deployment guide you will:

  • Understand the available mechanisms to deploy Workbrew through Jamf Pro,
  • Configure Jamf Pro to allow Workbrew to manage your fleet’s Homebrew installations,
  • Be ready to deploy Workbrew to your devices.

Pre-requisites

Before you begin following this guide, you should:

  • Have access to a Jamf Pro instance of version 10.49.0 or later,  
    • with user privileges to:
      • Create an API role and client
      • Create packages
      • Create policies
  • A Workbrew workspace:
  • Be aware of the system requirements for Workbrew (and Homebrew):
    • Everything Homebrew requires:
      • An Apple Silicon CPU or 64-bit Intel CPU.
      • macOS Ventura (13) (or higher) installed on officially supported hardware.
      • The Bourne-again shell for installation (i.e. bash).
      • Don’t worry about the Command Line Tools (CLT) for Xcode requirement, Xcode CLT will be installed as part of deployment.
    • Device enrolled in Jamf.
    • User account in the `admin` group or in the `workbrew_users` group

Quickstart

Are you an experienced Jamf administrator? These steps will get you up and going quickly. Read on for more detailed explanations.

  1. In Jamf Pro, create an API Role with “Read Computers” and “Read Accounts”.
  2. In Jamf Pro, create an API Client using the created role. Generate and save its Client ID and Secret.
  3. In the Workbrew console, enter the workspace settings and select Jamf as the MDM Type. Enter your Jamf API Client ID and Secret, and then save the Workbrew Workspace API key and installation script.
  4. In Jamf Pro, add the Workbrew Workspace API key and installation script as a new Shell/bash script, with Priority set as “before”.
  5. In Jamf Pro, add the Workbrew .pkg as a new package.
  6. In Jamf Pro, create a new policy referencing the created script and package, and set the desired scopes to deploy it directly to devices or enable self-service.
  7. In the Workbrew console, after deployment to a device, check Devices to ensure the expected device appears (please be aware that device inventory is updated periodically, not in real time).
  8. If needed, check the Troubleshooting guide and FAQ or contact us for support.

Deployment Overview

Workbrew is installed using a signed .pkg file, which installs several components:

  • The Workbrew agent.
  • The Secure Workbrew CLI, a wrapper around the standard Homebrew CLI.

In addition to installing the Workbrew .pkg on each device, you must run a (bash) script which connects the Workbrew agent to your Workbrew Console. The script also installs Command Line Tools for Xcode if your devices do not already have it. The Workbrew Console connection wizard will guide you through customization to your install script.

You can deploy the Workbrew .pkg through Package Deployment, using the Policy detailed in the following. You can use this Policy to deploy Workbrew to your devices, or enable Self-Service to allow users to install at their leisure.

In brief, you will perform these steps to ready Workbrew for deployment:

  • Create a Jamf Pro API Role and Client,
  • Complete the Workbrew Console connection wizard, adding the API Client credentials in the process,
  • Add the Workbrew Package and setup script to Jamf Pro,
  • Create a Policy for Workbrew to run the setup script and install the Workbrew package,
  • Optionally, make the Policy available for self-service.

Connecting Workbrew to Jamf Pro

Creating an API Role and Client in Jamf Pro

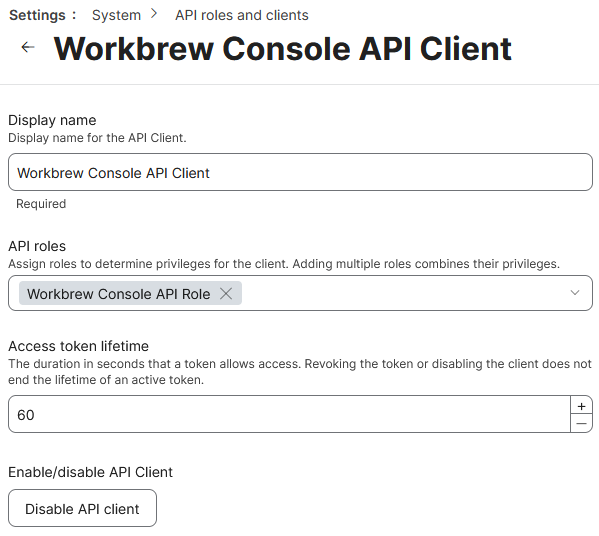
To populate your Workbrew Console with information about your devices and users, Workbrew requires Read-Only API access to your Jamf Pro instance. In this section, you will create an API Role and Client with sufficient permissions and retain the credentials for input into Workbrew.

To complete this step, follow the instructions in the Jamf Pro documentation to creating an API Role, an API Client, and a Client Secret, with the following additions:

Creating an API Role

    • 5. Enter “Workbrew Console API Role” as the role’s display name.
    • 6. Add both “Read Computers” and “Read Accounts” Privileges to a new API role in Settings > API roles and clients.  
      • If you don’t see this option in the Jamf Pro console, make sure you’re running version 10.49.0 or later

Creating an API Client

  • 5. Enter “Workbrew Console API Client” as the role’s display name.
  • 6. In the API Roles field, assign “Workbrew Console API Role” to the client.
  • 7. You can leave Access token lifetime at its default value. Make sure you Enable API client.

Generating a Client Secret

  • 3. Save the Client ID and Secret securely (for example in a password manager). You will enter these into Workbrew to connect it to Jamf Pro.
  • You can stop following the Jamf Pro document after saving the secret.

Add Jamf Pro to your Workbrew workspace

The Client ID and Secret created in the previous step will allow Workbrew to read from your Jamf Pro instance using the API. In this section, you will register Jamf as your MDM of choice within Workbrew.

  • Under MDM Type, select “Jamf”.
  • Under Jamf Host, enter the URL and port number (if applicable) for your Jamf Pro instance.
  • In the Jamf API Client ID and Jamf API Client Secret fields, enter the Client ID and Secret created in the previous section.
  • Click Update Workspace.
  • Open Workbrew Workspace API key and installation script, copy the script, and store it for later. This script will run as the first step in the installation policy.

Preparing the deployment artifacts

Add the installation script

The Workbrew Workspace API key and installation script saved in the previous step prepares the device for a Workbrew installation, setting environment variables for workspace directories and the Workbrew Workspace API key. It also installs a Homebrew dependency, Command Line Tools for Xcode, using MacOS’s `softwareupdate` utility. In this section, you will add the script to Jamf Pro so that it can be run as part of the Workbrew installation Policy.

Follow the steps under Adding a Script to Jamf Pro with the following additions:

  • 4. In the General pane, enter “Workbrew Workspace API key and installation script” as the script’s display name.
  • 5. In the Script pane, set the Mode to “Shell/Bash”. Paste the Workbrew Workspace API key and installation script into the code box.
  • 6. In the Options pane, set the Priority to “before”, to ensure the script runs before the package during Policy execution

Add the package

The Workbrew .pkg installs Workbrew, including the agent, CLI, and Homebrew. In this section, you will add the package to Jamf Pro so that it can be distributed as part of the Workbrew installation policy.

Download the package, and then follow the steps under Uploading a package to Jamf Pro with the following additions:

  • 4. In the General pane, enter “Workbrew-{VERSION}.pkg” as the script’s display name, replacing {VERSION} with the version being used.

5. Select Choose File and choose the Workbrew .pkg.

Deployment

The script and package will be deployed through a Jamf Policy. In this step, you will create a policy and choose to either deploy it immediately through the Policy scope, or enable self-service.

Follow the steps from Creating a Policy with the following additions:

  • 4. In the General pane, enter “Deploy & Connect Workbrew Agent” as the policy’s display name. Select the desired triggers for deployment.
  • 5. Add the script and package:
    • In the Scripts pane, click Configure and then Add the Workspace API key and installation script. Ensure that the Priority is set to “before”.
    • In the Packages pane, click Configure and then Add the Workbrew .pkg.

Once you have created the policy, you may want to deploy to one or more devices to test the deployment and ensure devices connect to Workbrew and are visible in the console. Workbrew devices check-in on a periodic basis, so it may take a little while for a new device to appear in your console.

Support

Learn More

Workbrew "Works With" SimpleMDM, Jamf, Kandji & Fleet

Workbrew simplifies large-scale device management through integrations with MDM provders SimpleMDM, Jamf, Kandji, and Fleet.

Read More